The other cloud I used was this chocolate cloud lollipop. They are really simple, inexpensive, but really created some great height and interest to the food table. Today I want to run through a bit of a how-to for you.
(You'll have to excuse my photos - nighttime in my kitchen = terrible light!)
1. Download your free cloud template here (following my lab testing, I have modified and 'pretty-fied' for you!). Print out template and place under a piece of baking paper that has been taped to the bench.
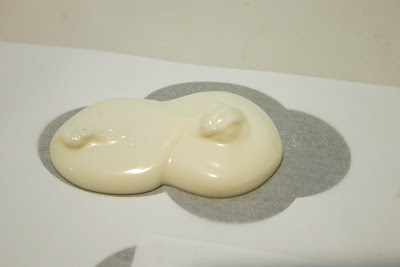
2. Place dobs of melted chocolate in the main areas of the clouds. By doing small dobs (is this a real word?!) and spreading you create the nice crisp joins instead of it being one big blob. 3. With the back of a spoon, gently spread the dobs to fill the template outline beneath. Pushing from the centre out helps to keep the nice round edge.
4. Place wooden skewer or long lollipop stick in to the cloud. You want it quite high up to help it stay on the stick when it's finished.
5. Spoon a little bit of chocolate over the stick to cover. Smooth as best you can as this is actually the front of your cloud. Leave to set.
6. Next comes the decorating! This is where you can vary to your specific theme - stripes, dots, colour, small lollies etc. I piped 'fly' onto my as it fit my theme best. I did all the one colour in a production line style. (Two bags of Nestle choc melts goes a long way!!)
7. I added accents with another colour. I used Wilton's candy melts as they have great colours. (Aus residents you can get them from here)
8. I then stuck mine into covered boxes for my table. Done!That was a long "how to" for something that is essentially quite simple, but I hope that makes it really clear and easy to follow!
I've thought idea could be used for a kite or rainbow party, or even edible photo booth props! What do you think? What kind of theme can you see these being used for?


awesome, thanks for this! great idea and love how you can really customise it for anything! have seen great mustache choc pops, cool! Thinking of doing a '1' for my little mans upcoming birthday.
ReplyDeleteThanks!!
These are a great idea, thanks for sharing :)
ReplyDeleteJordan, this party is so gorgeous, and I love to see sources from Australia (Brisbane even better!!) instead of the US which have all that lovely stuff we just can't get here!! Having said that though, I did buy a rainbow cookie cutter from Copper Gifts a US online store, as it was the only one I could find that had clouds on the end of the rainbow... and yes it cost more to ship than the cutter itself, but hey I reeeeally needed it!! They do have a cloud one too. Keep up the fabulous work .. you are very inspirational ♥
ReplyDeletewow thanks for the tutorial! that was an amazingly creative party! loved it!
ReplyDeleteHow cute are they! Thanks for sharing!
ReplyDeleteGorgeous - you are one talented chic!
ReplyDeleteLooks fabulous Jordan - great tutorial - will definitely give them a go! Leanne
ReplyDeleteoh nice one thanks for sharing x
ReplyDeleteHello, your ideas are great and very chic!
ReplyDeleteDo you think I can freeze the pops and have them a month from now?
I am trying to get started early on my favor making.
Thanks in advance!
Hi Carly, freezing chocolate I think might give it that mottled greyish/white speckles (correct me if I'm wrong peeps!).
ReplyDeleteYou could store in an airtight containter for a couple of weeks thought I'm sure just in the pantry.
If needed you could possibly store in the fridge (still may become mottled if using milk or dark chocolate). I have done this for cake pops before and they stayed looking and tasting great.
Hope that helps a little!
Jordan x